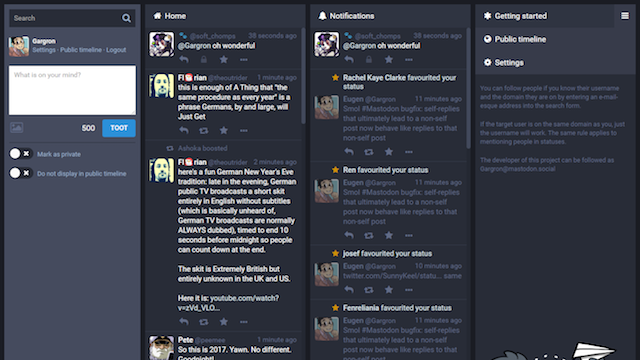
Mastodonは、イエナ大学出身の24歳のドイツ人Engen Rochkoによって2010年10月に公開されたSNSです。
Railsアプリケーションで、フロントエンドにはReactとReduxが使われている。
また、Dockerを利用していてクラウドサーバなどに容易に実装することができる・・・・そこがネックの人もいるのです。(おかげで5日くらいかかったけど(汗)
そこで、自前のサーバで構築する場合には、Dockerとか使わないのでwithout Dockerでインストールした際のメモである。
公式のgithub
公式のドキュメントに沿ってインストールしますが公式はUbuntuがベースなので部分的にCentOS向けに変えてあります。
環境構成
- CentOS7.3(1611)
- nginx 1.11.3
- Node.js v6.10.1
- Yarn v0.23.2
- PostgreSQL 9.6.0
- Redis v3.2.3(epel)
- rbenv 1.1.0
- Ruby 2.4.1(rbenv)
- Bundler 1.14.6(gem)
- ImageMagick 6.7.8.9
- FFmpeg 2.6.8(nux-dextop)
環境構築
必要ならreboot
epelリポジトリー有効化
必要パッケージのインストール
既に入っているものは除外してください。
ffmpegは、rpmfusion-free-updates リポジトリから 2.8.11が入れられますがnux-dextopの方が無難なのでそっちにしました。
公式では、pidentdを入れるとなっていますが、CentOS7では、authdに入っています。がこれはpostgresの起動に使う為でCentOS7ではxinetdは使ってないのでいれません。というかauthdに入っているから既に入っていると思います。
公式では、libxslt1となっていますがCentOSではlibxsltですね。
rubyはrbenvから入れますけど念のため。
nodejsのインストール
公式では、nodejs4.xと書いてありますが、nodejs6.10.1をepelから入れました。
最新版の6.10.2でも問題ないようです。最新版を入れるなら
yum install nodejs
Yarnのインストール
yum install yarn
Redisのインストール
systemctl start redis
systemctl enable redis
PostgreSQLのインストール
パッケージでインストールするなら
su – postgres
initdb
このあたりはPostgreSQL自体の設定は、postgresのガイドにそって設定してください。
pg_hbf.conf,postgresql.confの修正が必要です。
PostgreSQLのmastodonユーザ作成
psql
CREATE USER mastodon CREATEDB;
\q
もしくは、createuser -d mastodon
PostgreSQLの起動
systemctl enable postgresql
mastodonユーザの追加
su – mastodon
以下mastodonユーザで作業
rbenvのインストール
echo ‘export PATH=”$HOME/.rbenv/bin:$PATH”‘ >> ~/.bash_profile
echo ‘eval “$(rbenv init -)”‘ >> ~/.bash_profile
source ~/.bash_profile
git clone https://github.com/sstephenson/ruby-build.git ~/.rbenv/plugins/ruby-build
cd ~/.rbenv/plugins/ruby-build
./install.sh
rbenv -v
Ruby 2.4.1のインストール
rbenv rehash
rbenv global 2.4.1
rbenv global
mastodonのインストール
git clone https://github.com/tootsuite/mastodon.git live
cd live
gem install bundler
bundle install –deployment –without development test
yarn install
設定ファイルのコピーと編集
vi .env.production
.env.production
REDIS_HOST=localhost
REDIS_PORT=6379
# REDIS_DB=0
DB_HOST=localhost
DB_USER=mastodon
DB_NAME=mastodon
DB_PASS=
DB_PORT=5432
# Federation
LOCAL_DOMAIN=mastodon.moshbox.jp # マストドンのサーバ
LOCAL_HTTPS=true
# Application secrets
# Generate each with the `rake secret` task (`docker-compose run –rm web rake secret` if you use docker compose)
PAPERCLIP_SECRET= # rake secretを実行して入れる
SECRET_KEY_BASE= # rake secret
OTP_SECRET= # rake secret
rake secretを3回実行してそれぞれを入れます。
SMTPの部分は、外部のメールサービスを使うなら公式のものを参照してください。ローカルのサーバを使うならちょっといじらないとだめみたいです。
# Note: Mailgun and SparkPost (https://sparkpo.st/smtp) each have good free tiers
SMTP_SERVER=127.0.0.1
SMTP_PORT=25
SMTP_LOGIN=
SMTP_PASSWORD=
SMTP_FROM_ADDRESS=mastodon@moshbox.jp
SMTP_DELIVERY_METHOD=smtp # delivery method can also be sendmail
SMTP_AUTH_METHOD=plain
SMTP_OPENSSL_VERIFY_MODE=none
SMTP_ENABLE_STARTTLS_AUTO=false
そして、config/environments/production.rbの中のuser_nameとpasswordをコメントアウトします。
config.action_mailer.smtp_settings = {
:port => ENV[‘SMTP_PORT’],
:address => ENV[‘SMTP_SERVER’],
# :user_name => ENV[‘SMTP_LOGIN’],
# :password => ENV[‘SMTP_PASSWORD’],
:domain => ENV[‘SMTP_DOMAIN’] || ENV[‘LOCAL_DOMAIN’],
:authentication => ENV[‘SMTP_AUTH_METHOD’] == ‘none’ ? nil : ENV[‘SMTP_AUTH_METHOD’] || :plain,
:openssl_verify_mode => ENV[‘SMTP_OPENSSL_VERIFY_MODE’],
:enable_starttls_auto => ENV[‘SMTP_ENABLE_STARTTLS_AUTO’] || true,
}
これはあくまでもローカルのSMTPサーバを使用する場合です。
セットアップ
DBのセットアップ
CSS,Javascripのセットアップ
サービス化
/etc/systemd/system/mastodon-web.service
Description=mastodon-web
After=network.target
[Service]
Type=simple
User=mastodon
WorkingDirectory=/home/mastodon/live
Environment=”RAILS_ENV=production”
Environment=”PORT=3000″
ExecStart=/home/mastodon/.rbenv/shims/bundle exec puma -C config/puma.rb
TimeoutSec=15
Restart=always
[Install]
WantedBy=multi-user.target
/etc/systemd/system/mastodon-sidekiq.sercice
Description=mastodon-sidekiq
After=network.target
[Service]
Type=simple
User=mastodon
WorkingDirectory=/home/mastodon/live
Environment=”RAILS_ENV=production”
Environment=”DB_POOL=5″
ExecStart=/home/mastodon/.rbenv/shims/bundle exec sidekiq -c 5 -q default -q mailers -q pull -q push
TimeoutSec=15
Restart=always
[Install]
WantedBy=multi-user.target
/etc/systemd/system/mastodon-streaming.service
Description=mastodon-streaming
After=network.target
[Service]
Type=simple
User=mastodon
WorkingDirectory=/home/mastodon/live
Environment=”NODE_ENV=production”
Environment=”PORT=4000″
ExecStart=/usr/bin/npm run start
TimeoutSec=15
Restart=always
[Install]
WantedBy=multi-user.target
サービス有効化と実行
systemctl start mastodon-web.service mastodon-sidekiq.service mastodon-streaming.service
firewalldのサービスの許可
Nginxの設定
SSL証明書にLet’s Encryptを使用
IPv6を使ってないならその箇所をコメントアウトした方がいいようなことをIssueに書かれていた。
example.comを自分のドメインに
/etc/nginx/conf.d/mastodon.conf
default upgrade;
” close;
}
server {
listen 80;
#listen [::]:80;
server_name example.com;
return 301 https://$host$request_uri;
}
server {
listen 443 ssl;
#listen [::]:443 ssl;
server_name example.com;
ssl_protocols TLSv1.2;
ssl_ciphers EECDH+AESGCM:EECDH+AES;
ssl_ecdh_curve prime256v1;
ssl_prefer_server_ciphers on;
ssl_session_cache shared:SSL:10m;
ssl_certificate /etc/letsencrypt/live/example.com/fullchain.pem;
ssl_certificate_key /etc/letsencrypt/live/example.com/privkey.pem;
keepalive_timeout 70;
sendfile on;
client_max_body_size 0;
root /home/mastodon/live/public;
gzip on;
gzip_disable “msie6”;
gzip_vary on;
gzip_proxied any;
gzip_comp_level 6;
gzip_buffers 16 8k;
gzip_http_version 1.1;
gzip_types text/plain text/css application/json application/javascript text/xml application/xml application/xml+rss text/javascript;
add_header Strict-Transport-Security “max-age=31536000”;
location / {
try_files $uri @proxy;
}
location @proxy {
proxy_set_header Host $host;
proxy_set_header X-Real-IP $remote_addr;
proxy_set_header X-Forwarded-For $proxy_add_x_forwarded_for;
proxy_set_header X-Forwarded-Proto https;
proxy_set_header Proxy “”;
proxy_pass_header Server;
proxy_pass http://127.0.0.1:3000;
proxy_buffering off;
proxy_redirect off;
proxy_http_version 1.1;
proxy_set_header Upgrade $http_upgrade;
proxy_set_header Connection $connection_upgrade;
tcp_nodelay on;
}
location /api/v1/streaming {
proxy_set_header Host $host;
proxy_set_header X-Real-IP $remote_addr;
proxy_set_header X-Forwarded-For $proxy_add_x_forwarded_for;
proxy_set_header X-Forwarded-Proto https;
proxy_set_header Proxy “”;
proxy_pass http://localhost:4000;
proxy_buffering off;
proxy_redirect off;
proxy_http_version 1.1;
proxy_set_header Upgrade $http_upgrade;
proxy_set_header Connection $connection_upgrade;
tcp_nodelay on;
}
error_page 500 501 502 503 504 /500.html;
}
Let’s Encryptのインストール
SSL証明書の取得
chmod 700 /usr/bin/certbot-auto
実行
–webroot \ # 既存のウェブサーバを使うモードを選択
-w /usr/share/nginx/html \ # ドキュメント・ルートのパス
-d secure.zem.jp \ # 認証するドメイン名
–email <メール>@<アドレス> # メールアドレス登録(証明書期限切れの通知用)
nginxのルートのパスは、mastodonの方で。
パッケージをインストールする旨が出るのでy
利用規約が出てくるのでAgreeで続行
IMPORTANT NOTESが出てくれば完了
証明書などは、/etc/letsencrypt/live/ドメイン名/以下に入る
設定したら、サービス再起動
管理者設定
mastodonのユーザを登録してそのユーザを管理者に割り当てる(例は、alice)
実行コマンド一覧
Cronjob
日々の処理をcronに登録
@daily cd /home/mastodon/live && /home/mastodon/.rbenv/shims/bundle exec rake mastodon:daily > /dev/null
一つに統合されたみたいだ。最初は二つあったけど。
SELinuxのポリシー設定
httpd_read_user_content
httpd_can_network_connect_db
httpd_can_sendmail
をonにするのだが以下にポリシーを作ってくれた人がいるのでそれを反映させる
アップグレード
git fetch
git checkout $(git tag | tail -n 1)
RAILS_ENV=production bundle exec rails db:migrate
yarn install
RAILS_ENV=production bundle exec rails assets:precompile
sudo systemctl restart mastodon-*.service
つまづいたところ
当初、dockerを入れたりしてやったのだがうまくいかなかったのでdockerなしでやりはじめた。しかし、ネットの環境などの影響で関係ないところで時間を浪費してしまった。
最初のつまづきとしては、SMTP関連だったが、これはすぐに解消された。
また、最大の行き詰まりは、リモートフォローができないことだった。他の機能などは問題なかったのだが、外部インスタンスからの検索とフォローでエラーが出てしまいフォローできない。
検索すると「422 remote account could not be resolved」と出るので再度インストールしなおしたりとしたのだが、原因としては、SSL証明書の設定つまりは、nginxのSSL設定に問題があったようだ。
他にも問題がでるかもしれないのでしばらく様子見としよう。


